Asphalt Plant Order Form: What to Include for Paving Customers
An asphalt plant’s order form for paving customers should include several key pieces of information in order to ensure that the customer receives the correct mix of asphalt for their project.
First, the form should have a section for the customer to provide basic contact information, such as their name, company name, and contact phone number. This will allow the plant to easily get in touch with the customer if there are any issues or questions with the order.
Next, the form should have a section for the customer to specify the type of asphalt mix they need. This could include options such as standard hot mix asphalt, warm mix asphalt, or a specific type of asphalt mix designed for a particular application (e.g. heavy duty, high traffic).
The order form should also have a section for the customer to specify the quantity of asphalt mix they need. This could be measured in tons, pounds, or another unit of measurement.
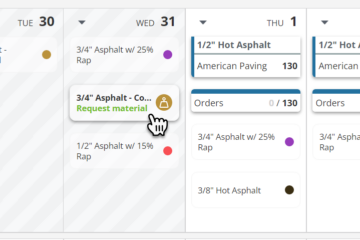
Additionally, the order form should have a section for the customer to specify the delivery schedule for the asphalt mix. This could include options such as same-day delivery, next-day delivery, or a specific delivery date and time.
Finally, the order form should include a section for the customer to provide any additional notes or special instructions for the order. This could include information about the location of the project, any special requirements for the asphalt mix, or any other relevant details.
Overall, an asphalt plant’s order form should be designed to provide the plant with all the information they need to properly mix and deliver the right type and quantity of asphalt to the customer’s job site, and also allow the customer to have all the information they need to make the right choice of product, quantity and delivery schedule.
Understanding the PlantDemand default order form
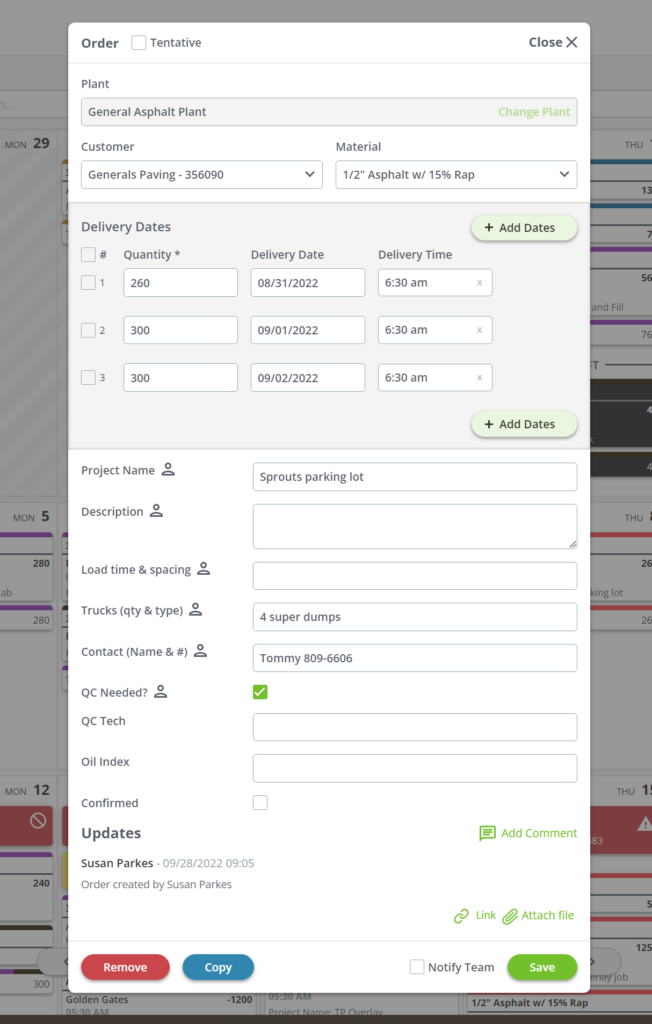
PlantDemand’s default order form includes several sections. To top of the form allows a scheduler to put in the customer, and the mix. The customer field will auto-suggest past customers used. Also, at plant setup, a list of customers may be provided to PlantDemand, and we can pre-load your customers for you. This helps standardize how the customer’s name is entered – especially if you would like to include the customer’s account number in their name. The list of mixes can be setup in the Materials tab in settings. View the academy page that walks you through setting up materials and mixes at your plant.
Next, there is a section where you can add the tons, dates, and starting load times for this job. You can click “Add Dates” to include more paving days. You can also remove dates, push all dates forwards or backwards, or move certain days to a different plant.
After the quantity and date section, you have an area that is customizable to meet the needs of your plant and operation. You can add, edit, and rearrange the fields to make sure it is easy to fill out, and so that you have all the information you need.
The Updates section will create a feed of everything that has changed on the order since it was created. This helps you know who to call if an issue arises due to the change
Last, there is a section to add a link to a shared file, a project folder, etc. There is also the ability to attach a file.
The “Notify Team” box should only be checked if the change is for the next day, or creates a major scheduling challenge. When this box is selected, all team members will get a push notification on their devices, or an email. Discuss with your team when it should be appropriate to select the Notify Team box.
How to setup the order form on PlantDemand
- Go to the Plant Settings page (look for the gear icon in the upper right of the plant page)
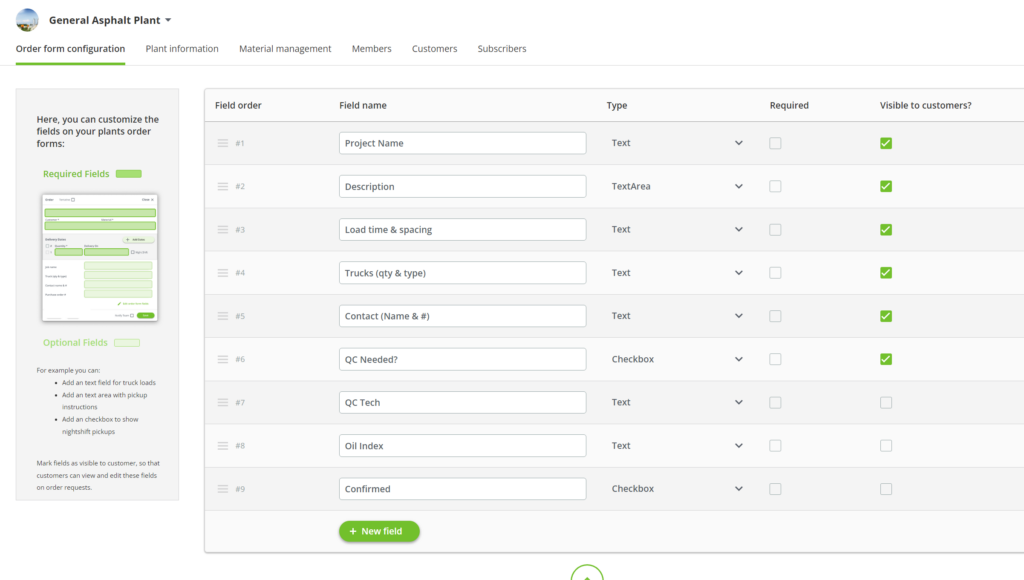
- The first tab you will see is the Order form configuration
- Review the current fields and their field type
- Mark fields “Required” only if they are vital for initially saving the order. If they are marked as required, the field will move up above the order quantities and dates section
- Check “Visible to Customer” if you use the Customer Portal and you would like your customers to be able to fill in this field
- To change the sequence of the fields, click and hold the “hamburger” icon that is on the far left side of the field line. This looks like 3 stacked small lines. Drag and drop the order fields to the sequence that works best for your team
- Adding a new field is done by selecting the “+ New field” button. Write the field name, choose the field type, and then click “Add”.
Something to consider when setting up your asphalt plant’s order form:
The order form can be customized for each of your asphalt plants or quarries. Talk to your plant team periodically to see if there would be benefit to adding additional fields, or changing what you currently have.
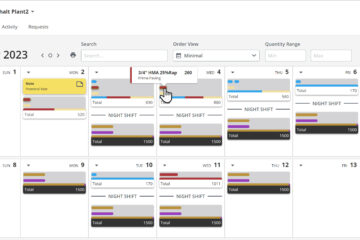
Additionally, the fields added to the order form can be shown on the calendar by selecting which fields you would like to see when you are in the Material View, or the Customer View. Also, these fields can be used when formatting an Input Material Forecast or the Output Forecast in the Reports Page. Try to avoid adding far too many fields, but make sure that you add enough for everyone involved in your plant. For example: Adding an “Oil Index” field can allow tracking of indexed orders, and to make sure the person ordering your bitumen/oil knows to provide the index number.
If you are not using PlantDemand to schedule your asphalt plant or quarry, try it now!
The International Organization for Standardization (ISO) establishes quality management and operational standards used across construction materials industries.
The Federal Highway Administration (FHWA) oversees asphalt pavement specifications and highway construction standards across the United States.
The U.S. Department of Transportation oversees federal transportation policy, infrastructure investment, and construction material standards.